Reactの開発環境をDockerで作る
タイトルの通りです。 ブログの目標は以下。
- Reactのサンプル環境をDockerで作成する
- Reactのサンプルを動かす
- それらをgit管理できる状態にする
ソースコードはここにあります。 github.com
Reactのサンプル環境をDockerで作成する
最低限のReact環境を作るために、
以下のDockerfileとdocker-compose.ymlを作成します。
Dockerfile、docker-compose.ymlの項目の説明はコメントでつけています。
実際の処理とは関係ないので、不要であればコメントアウトください。
Dockerfile
# サーバ再度にJavaScriptの実行環境として、node.sjを利用
FROM node:12.18.1

# ポート解放
EXPOSE 3000

# コンテナプロセスの実行されるディレクトリを指定
WORKDIR /usr/src/app
docker-compose.yml
# 利用するdocker-comnposeのバージョン
version: '3'

# アプリケーションで動かすための各要素
services:
  # コンテナ名
  node:
    # 起動するコンテナの設定
    build:
      # ディレクトリの指定
      context: .
      # 使用するDockerfileの名前を指定、「Dockerfile」という名前なら省略可能
      dockerfile: Dockerfile
    container_name: nyan_cat
    # ディレクトリのマウントの設定、:前がホストのディレクトリ、:後がコンテナのディレクトリ
    volumes:
      - ./:/usr/src/app
    working_dir: /usr/src/app
    command: sh -c "cd react-sample && yarn start"

    # ポート設定、:前がホスト側のポート、:あとがコンテナ側のポート
    ports:
      - "3000:3000"

    # Tele-TYpewriter、コンテナ起動後に終了させないための設定
    tty: true
上記2ファイルを作成した後で、以下を実施することでdockerのイメージを作成することができます。
docker-compose build
イメージを作成したら、reactのサンプルを作成します。
docker-compose run --rm react_node_service sh -c "npm install -g create-react-app && create-react-app react-sample"
react_node_serviceはサービス名です。
$ docker-compose run --rm node sh -c "npm install -g create-react-app && create-react-app react-sample"
Creating network "app_web_default" with the default driver
Building node
Step 1/3 : FROM node:12.18.1
 ---> f5be1883c8e0
Step 2/3 : EXPOSE 3000
 ---> Using cache
 ---> 81640de8425c
Step 3/3 : WORKDIR /usr/src/app
 ---> Using cache

...


Success! Created react-sample at /usr/src/app/react-sample
Inside that directory, you can run several commands:

  yarn start
    Starts the development server.

  yarn build
    Bundles the app into static files for production.

  yarn test
    Starts the test runner.

  yarn eject
    Removes this tool and copies build dependencies, configuration files
    and scripts into the app directory. If you do this, you can’t go back!

We suggest that you begin by typing:

  cd react-sample
  yarn start

Happy hacking!
これらのコマンドの使用は一回だけで問題ないです。
立ち上げるアプリの名前を変える場合、 create-react-app react-sampleの名前と、 docker-compose.ymlのcommand: sh -c "cd react-sample && yarn start"をそれぞれ変更すればOKです。
必要に応じてコンテナ名やportも変えてください。
React + TypeScript環境を作りたい場合
TypeScript環境が作成したい場合は、--typescriptオプションをつけた下記コマンドを実行して下さい。
docker-compose run --rm node sh -c "npm install -g create-react-app && create-react-app react-sample --typescript"
インストール環境によっては、時間のかかりすぎでyarnの実行中に失敗することがあります。
yarn add v1.22.4
[1/4] Resolving packages...
[2/4] Fetching packages...
info There appears to be trouble with your network connection. Retrying...
info There appears to be trouble with your network connection. Retrying...
info There appears to be trouble with your network connection. Retrying...
info There appears to be trouble with your network connection. Retrying...
info There appears to be trouble with your network connection. Retrying...
error An unexpected error occurred: "https://registry.yarnpkg.com/rxjs/-/rxjs-6.5.4.tgz: ESOCKETTIMEDOUT".
info If you think this is a bug, please open a bug report with the information provided in "/usr/src/app/react-sample/yarn-error.log".
info Visit https://yarnpkg.com/en/docs/cli/add for documentation about this command.
その場合は、.yarnrcを作成し以下のように記載してください。
単位はミリ秒なので、下記の場合は10分です。
network-timeout 600000
Reactのサンプルを動かす
コンテナを起動し、reactサーバーを立ち上げます。
docker-compose up -d
上記が実行された後ブラウザ上で、
http://localhost:3000/ へアクセスすることで動作に確認ができます。
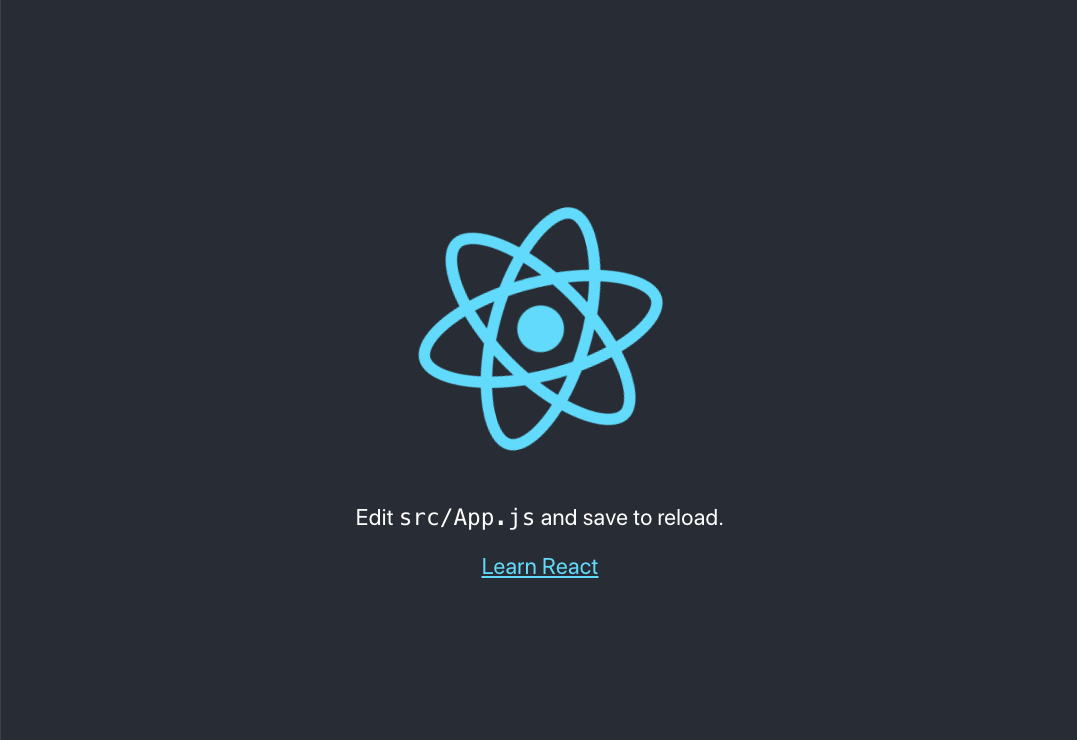
サンプルの動作が確認できた場合、次のような画面が開きます。

それらをgit管理できる状態にする
作成されたreact-sampleとDockerfileとdocker-compose.ymlをまるっとgitなどで管理してあげることで、他の環境でもアプリを開発できるようにできます。
その場合は他環境ではcreate-react-appをする必要はなく、docker-compose buildとdocker-compose up -dだけで十分です。